Showing posts with label Throwback Thursday. Show all posts

Thursday, July 24, 2014

TBT Bookmark Free Crochet Pattern

This week I decided for TBT I would repost a pattern of mine for a bookmark. This same pattern could be made with worsted weight yarn to make a scarf or afghan. It is easy and would make a great gift at Christmas for the book lover on your list. Make this and insert in a book you give them. Next TBT I will show you two more bookmark patterns. This is my original pattern so please do not repost with out my permission or try to pass off as your own.


Crocheted Friendship Circle Bookmark Pattern


This is the first of the Bookmark patterns I have made to give to followers on my blog mysteryreadingnook.blogspot.com I will be posting another one next week. This is a great small gift for friends, book clubs, and to give with books you give as gifts. Hope you like it and let me know if there are any mistakes in my pattern.


  Crocheted Friendship Circle Bookmark Pattern

Materials

D hook
Size 10 crochet thread I used multicolor

Directions

First motif

Rnd 1 Ch 4 sl st to first ch to form circle ch 1 10 sc in ring join with sl st to beg sc (10 sc)
Rnd 2 ch 3 (1st dc) dc in same st. 2 dc in ea sc around join with sl in top of beg ch 3 (20 dc)
Rnd 3 ch1 sc in same st, ch 3 *sk.next dc sc in next dc, ch 3 sk nxt dc repeat from * around sl st to beg sc (10 sc, 10 ch 3 spaces)
Rnd 4 sl st to first ch 3 spaces, ch 3(first dc) 5 more dc in sp, * 6 dc in next ch 3 space repeat from * to end sl in top first ch 3
Rnd 5 ch 1 sc in same st ch 5 sk next 5 dc sc in next dc ( this is first dc of next group of 6 dc) * ch 5 sk next 5 dc sc in next dc repeat from * around end with sl st in first sc fasten off

2nd motif

Repeat like first motif to last round
Last round ch 1 sc in same st, *ch 5 going through ch 5 sp on 1st motif then sk next 5 dc on 2nd motif and sc in next dc (1st dc of next 6dc) on 2nd motif *repeat one more time from*-* finish last round like last round of 1 st motif

3 motif repeat same as 2nd motif attaching to 2nd motif like 2nd motif was attached to 1 st motif
Follow Deb Forbes's board My patterns on Pinterest.

Thursday, June 19, 2014

TBT Gluten and Corn free Spicey Hamburger Rice Dish


FRIDAY, JUNE 12, 2009

Gluten and Corn free Spicey Hamburger Rice Dish

We are always looking for ways to change up what we eat because I have to not eat any gluten or corn. My husband came up with this recipe and we really like it. It can be used by itself or with a salad or as a filling for stuffed green bell peppers.
Ingredients are:
1 1/2 lbs ground beef
1 jar Jumping Jacks Mild Salsa ( you can use any salsa of your choice this one is gluten and corn free and is made by my brother)
10 oz of long grain white rice ( we used Rice Expressions organic white rice that is microwaveable)
Shredded cheddar cheese to your liking

Cooking:
Brown the ground beef in a skillet and drain. Cook the rice as it says to. Now to ground beef add the rice and jar of salsa and cook till salsa is warm and ingredients are mixed well. Add the shredded cheese to taste stirring until melted. Serve up and add more shredded cheese to top. Makes a large serving for two if you are hungry. It is a great way to change things up. Hope you like it.

Thursday, June 5, 2014

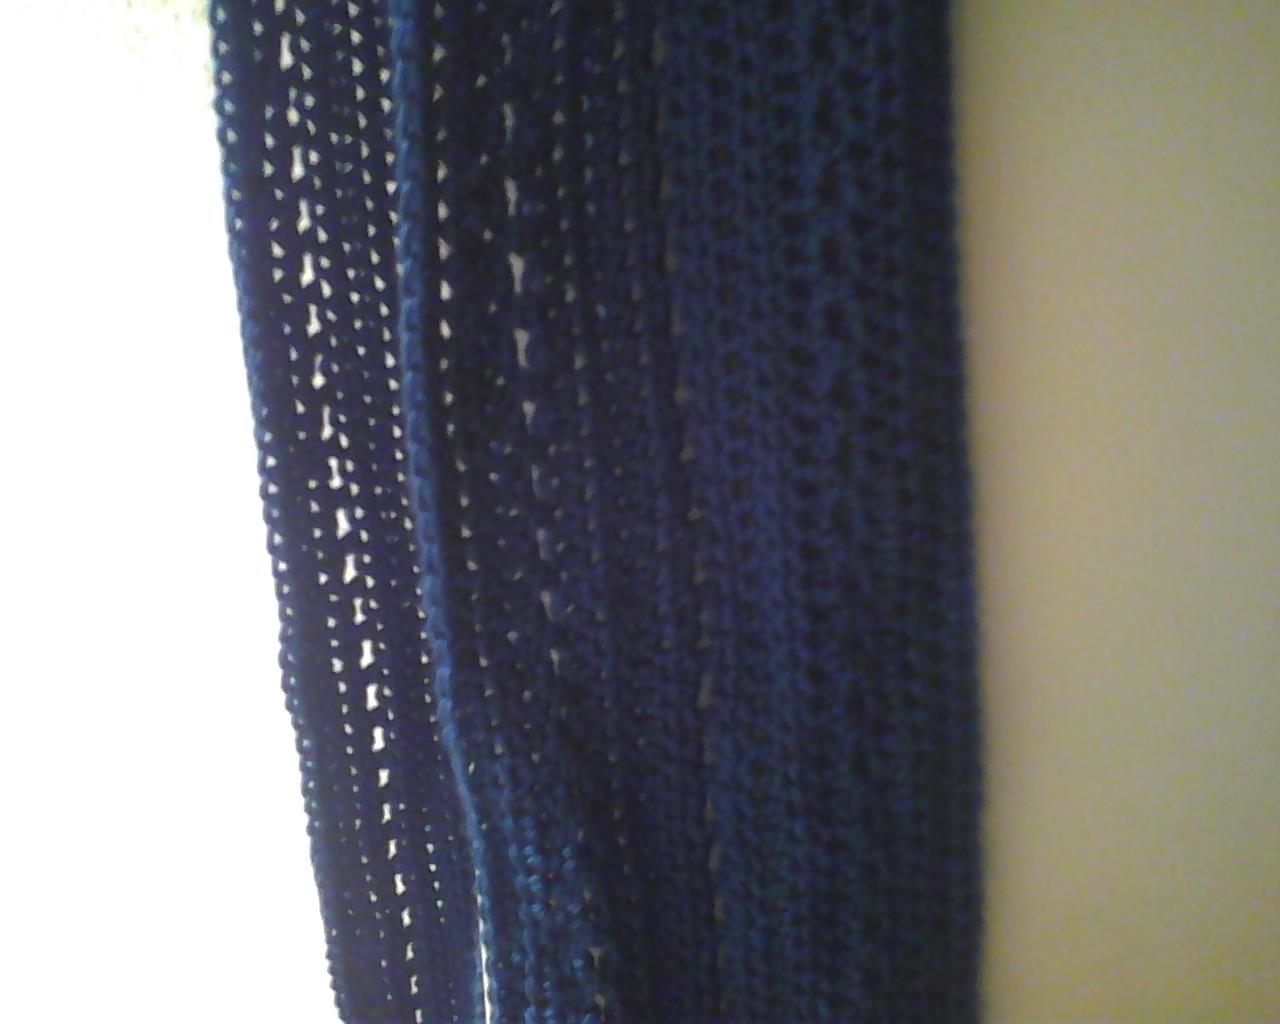
TBT Simple Blue Scarf Crochet Pattern

Scarfs are one of my favorite things to make and for TBT I have re- posted one of my favorite patterns


Friday, November 30, 2012

Simple Blue Scarf

My Granddaughter turned 18 this month and so I decided to crochet her a scarf. She loves the scarfs I make her from the fun fur to the warm ones and all in between. This one is for warmth with hopefully enough fashion to be worn with anything.


This is a simple pattern but looks elegant.
 
Materials
Caron's Simply Soft yarn in your choice of color ( I used ocean though here it looks really blue)
size J hook
 
Instructions
 
Row 1 ch 250
Row 2 hdc in 2nd ch from hook and ea ch across
Row 3- 4 ch 2 turn, hdc in first hdc and ea hdc across
Row 5 ch 2 turn, hdc in first hdc, ch 1, sk next hdc, hdc in next hdc, *ch 1 sk next hdc, hdc in next hdc repeat in pattern from * to end
Row 6 ch 2 turn, hdc in ea hdc and ch 1 space across
Row 7 ch 2 turn hdc in ea hdc across
Row 8-9 repeat row 7
Repeat rows 5-9 two times more then fasten off and weave in ends.
I made this scarf long so that she can wear it in many different ways.
This would also be easy to make into a cowl by sewing the ends together when finished.
It was simple, easy and fast and I plan on making more for presents. This would also be an easy pattern to make several for gifts to shelters.
I wrote these instructions down after I made this so I am hoping the instructions are accurate.
This is my own pattern and feel free to use but please give me credit
Thanks and happy crocheting
 

Thursday, May 29, 2014

TBT Old Family Recipe Egg Noodle Recipe


My Grandma Snodgrass's Egg Noodle Recipe


This recipe was one handed down from my Grandma's mother to my Grandma to my Mom to me to my Kids to my Grandkids. We had these noodles every Thanksgiving and Christmas. It was always so much fun to go over and help Grandma and Mom make the noodles. I have a lot of great memories of being together, getting flour all over all the while laughing while  mixing, rolling and cutting up the noodles. When Grandma got where she couldn't do it anymore she sat there and supervised the rest of us doing them. This was a family tradition and one I was glad to pass on to my kids and grandkids. No as everyone has grown up and it's harder to get together before Thanksgiving to make these they buy store bought noodles but they are not the same and we don't have the memories we did back when we got together to make them for the holidays. I would never trade the time we spent together making egg noodles. This recipe is in my Mom's hand writing because Grandma didn't write down a recipe. As we did it you just knew if you had enough water and flour and it just became something you did from habit. Mom wrote it down so that it could be passed on to others in the family and I am using it today as my throwback Thursday post.

Always cherish the family traditions and make sure to share the times, stories and make new memories as the next generations come along.

This is Grandma Mattie Snodgrass in the Kitchen.

Thursday, May 22, 2014

TBT Crocheted Baby Afghan Pattern

THURSDAY, APRIL 29, 2010


Crocheted Baby hugs and kisses afghan


Baby hugs and kisses afghan

Materials

Rainbow Sensations yarn 2 lg skeins
J hook

Ch 120
Row 1 dc in 4th Ch from hook and ea across. At end of row ch3 turn.
Row2-6 dc in ea dc across Ch 3 turn
Row7-12 ch3 is first dc* sk next dc dc in next dc dc in skipped dc x stitch made * rep from * to last stitch dc in last stitch ch3 turn
Row 13-18 rep row 2
Row 19-24 rep row 7
Continue in thus pattern to desired size finishing with rep of row 2 fasten off

Border
Rnd 1 Join yellow with a sl st in corner st ch1 sc in same st. Evenly scaround putting 3 sc in ea corner to first st put 2 more sc in same st as joining of yarn at beg join to first sc at beg
Rnd 2 ch4(1st dc ch1) dc in same st( v st made) sk next sc v st in nextsc content around putting v st ch1 v st in ea corner. Join to ch3 of beg Ch 4
Rnd 3 sl st to space between first 2 v sts ch4(1st dc ch1) dc in samesp. V st in space between 2 v sts around with v st Ch 1 v st in ch1 spbetween the 2 corner v sts. Join with sl st in 3rd Ch of beg Ch 4 fasten off and weave in.

Thursday, April 3, 2014

TBT Gluten Free Beef Teriyaki and Rice

Friday, March 1, 2013

Gluten Free Beef Teriyaki and Rice

 
 Last night was one of those nights where I had to go to the freezer and pantry and use what I had there because I needed a fast easy and delicious dinner. I had frozen  vegetables, rice and ground beef, so I made Gluten Free Beef Teriyaki and rice. It was wonderful and the husband loved it which is a big plus to any recipe. Truth be told I spent most of the day finishing a baby afghan and wrist warmers so I had completely forgotten about dinner so had to have a fast solution. If you ever find yourself needing something good and quick give it a try.

Ingredients:
1 lb lean ground beef
1 pkg frozen Vegetable Medley ( mine had the mix of broccoli, red peppers, and green beans)
1 cup cooked rice
1 13.5 oz bottle of Island Organic Teriyaki from Organiville Foods. They have two different gluten free teriyaki sauces and either one would be great for this dish. http://organicvillefoods.com/category/products/teriyaki-sauces/

Directions:
Brown  ground beef in large skillet and drain. While browning the ground beef cook your cup of rice. I cooked mine in a rice cooker which made it really easy. Also cook the frozen vegetables while browning the meat. Add the frozen vegetables, rice and bottle of teriyaki to skillet, mix well lower heat and let simmer for 10 minutes or till all is heated through and the flavors have mix in well.
Serve with more rice or with a salad and you have a great meal.

Now that you have a fast dinner to fix you can do like I did and crochet away. The pattern for both the wristers and baby afghan will be posted later.

Thursday, March 27, 2014

TBT Chocolate Chip Coconut Macaroons Recipe

I have been craving these but since I am watching what I eat I haven't made any. Here is my recipe that I posted so you can make them maybe and enjoy them.


Wednesday, September 12, 2012

Chocolate Chip Coconut Macaroons

I was looking for a new cookie to try that was easy and quick to make but delicious. I love coconut and chocolate so decided to combine the two into an easy cookie. I had made these simple coconut macaroons without the chocolate chips and decided they would work well with chocolate included. These are a big hit with my family and so easy. Give them a try and remember they would be a great and easy cookie to take to Holiday parties that are coming up.

                                    Chocolate Chip Coconut Macaroon

Ingredients:

1 (14 oz.) pkg sweetened flaked coconut                        2 tsp vanilla extract
1 (14 oz.) can eagle brand sweetened                              1 1/2 cups chocolate chips (or as many as you
    condensed milk                                                             like without over powering the coconut)

Directions:

1. Preheat oven to 350 degrees. Line baking sheet with parchment paper.
2. In a bowl, combine milk and vanilla. Mix well. Add coconut and chocolate chips. Mix well making sure coconut and chips are well coated and mixed together. Drop by teaspoon onto parchment lined baking sheet and with back of spoon slightly press down to flatten some. Bake 8-10 minute or until lightly browned. Remove from baking sheets and place on parchment covered cooling racks.
Depending on how big you make these you can get about 30 cookies. Let cool and then put in container. These will be chewy and sticky but oh so good.

I hope you will give these a try. Easy and delicious.

Thursday, March 20, 2014

Throwback Thursday Lacy Steampunk Wrister Pattern

This is my pattern so if you use it please give me credit. Do not sell or post pattern on another site without my permission.


Wednesday, April 24, 2013

Lace Steampunk Wristers Pattern


Wristers

Materials
Red Heart fashion crochet thread size 3 ( I used black)
F hook

Instructions
With f  hook ch 41
Row 1 sc in 2nd ch from hook and ea ch across ch 1 turn (40 sc)
Row 2 sc in first sc, ch 2 skip 2 sc, sc in next sc,* ch 2 skip 2 sc sc in next sc, repeat from * to end ending with sv in last sc ch 1 turn
Row 3 sc in first sc, *2 sc in ch 2 sp, sc in sc repeat from * across ch 1 turn
Row 4 sc in first sc,* ch 2 skip 2 sc, sc in next sc, repeat from * across
Row 5 repeat row 3
Row 6 rep row 4
Row 7 rep row 3
Row 8 rep row 4
Row 9 rep row 3
Row 10 rep row 4
Row 11 rep row 3
Row 12 rep row 4
Row 13 rep row 3
For border do sc in ea st around and down sides putting 3 sc in ea corner. Sl to beg sc
Sl in first 10 sc sc in next st (ch 3 skip 1 sc sc in next sc) 9X sc in next st leave rest of row unworked
Ch1 turn sc in sc ch 3 sc in next sc across ch 1. Turn
Repeat for 3 more rows
Ch 1 sl to ch 3 loop sc in loop ch 3 sc in next ch 3 loop across to last loop sl to last sc ch 1 turn repeat for 9 rows last row is just one loop sl to sc then ch 12 sl to sc on other side of ch 3 loop. Sc in ea ch of ch 12 sl to beg and finish off

Go to side and attach string on side with slip.st ch 1 sc.in same space 15 sc across side. Ch 1 turn sc in ea sc
Do 2 more rows of sc for total of 4. At end of last row ch 1 turn sl st in first sc ch 5 sk 5 sc sl st in nxt sc ch 5 sk 5 sc sl st in next sc ch 5 sk next 5 sl in last sc finish off (3 ch five loops made)
Repeat on other side
For tie.ch 50 weave tie through ch 5 loops on sides
Sew a metal key to middle of hand back

As always I made these up as I went then wrote the pattern down. I try not to make it too confusing or have mistakes but mistakes are possible.

Enjoy the pattern if you make them let me know and show pictures.


Thursday, March 13, 2014

Throwback Thursday Easter Basket from a Crocheted Doily

Thought I would share this again for Throwback Thursday so that you will have time to get started on them if you want them for Easter. You can crochet your favorite doily or get one of the store bought ones to do this. I prefer to make mine but either way hope this gives you an idea for Easter Baskets this year.


Thursday, February 26, 2009

Crocheted Doily Easter Baskets


Last year for Easter I made my Grandkids, Aunt and Mom and Dad Easter baskets from crocheted doilies. The picture above is of one of them. After Easter you can put other things or silk flowers in them for decoration. It is a simple way to make a basket.

This picture is of another doily basket I made and put flowers in for a table decoration at a retirement party. I had done some in smaller doilies and some in this size. The smaller ones were on the tables that people sat at and this and another one just like it was on the serving tables.

The way to make these is simple. You crochet your favorite doily and then you put it into a plastic bag with fabric stiffener. Make sure you get the whole doily wet with the stiffener then squeeze off the excess. Drape the doily over a bowl or whatever you have that is the shape you want the basket to be in and let dry completely. Remove and add flowers or plastic eggs or whatever you like. That's it simple. I hope you try this and enjoy.

Thursday, February 27, 2014

Throwback Thursday Candy Recipe from past

Friday, February 20, 2009

Chocolate Peanut butter Peanut Clusters

I have to eat things without gluten or corn and was really wanting some chocolate so at Christmas my daughter, granddaughter, grandson and I decided to make some candy that I could eat and everyone liked it too. I will share some more with you later but here is one of the ones we made.

Chocolate Peanut Butter Peanut Clusters
Ingredients
1 12oz pkg gluten and corn free chocolate chips(we used Whole Foods 365 brand)
1 12oz pkg gluten and corn free peanut butter chips
1 jar of roasted peanuts (make sure no cornstarch has been used by looking at the ingredients on the jar.)

In a microwave safe bowl put 2/3 of the pkg of chocolate chips and the whole pkg of peanut butter chips in the bowl. Heat at 30 second intervals till melted. Stirring half way through. Take bowl out and add the rest of the chocolate chips to temper the chocolate stir till the chips are melted. Add the jar of peanuts or as many as you like to taste. Stir till thoroughly mixed then you can either spread the mixture out on wax paper and let it cool or you can use a spoon and put the mixture out by spoonfuls on the wax paper and leave to cool. If you spread the mixture out when it is cool you can break it into pieces. Store in an airtight container and enjoy.