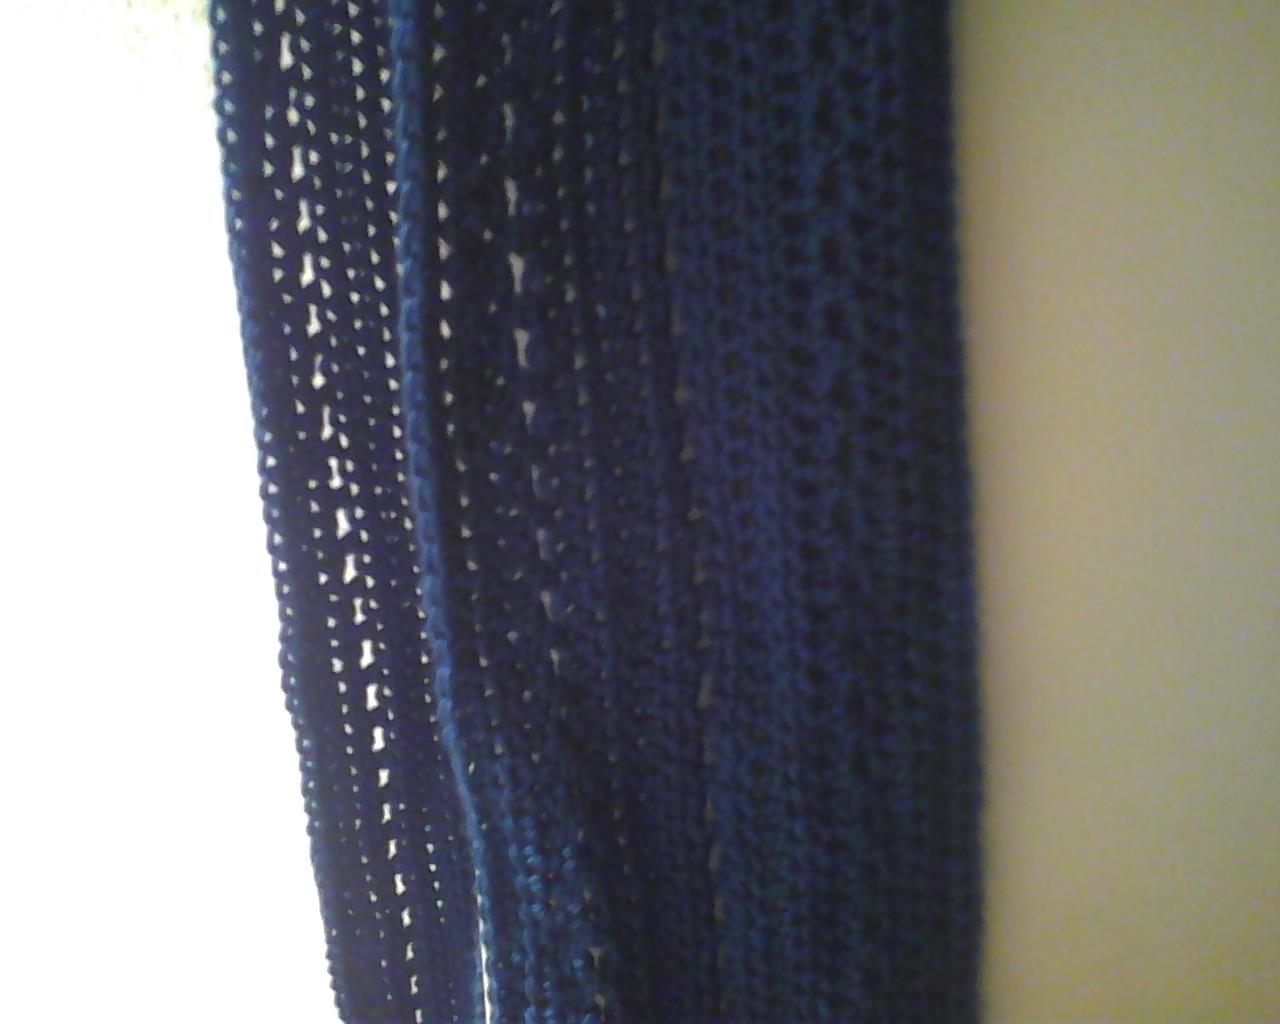
Monday, September 29, 2014

My Crocheted Pocket Tissue Holders

Christmas is approaching fast and like most years I am behind on getting started on my gifts. I have some started but not very far along. My daughter wanted me to make a hat for a co worker so I did and then for fun I made these two pocket tissue holders. I am working on a couple of more designs but these two were my first experiment, now to refine them before I give them away as gifts. I worked them as I went and didn't have a pattern. Thought I would share a picture of them


I will share the others when I get them done too.
The other things I have been working on for my Grandson who wanted them is Pokemon Balls, here are the two I have done


That is what I have been doing among several WIP so more later.
 
Until Next Time Keep on Crafting!

Thursday, August 21, 2014

Crochet Head Scarf Kerchief Pattern


Headscarf Kerchief

Caron Simply Soft Ocean

F hook

Row 1 Magic circle then do 4dc in magic circle, pull tight turn

Row 2 ch 3 (counts as 1st dc throughout) dc same St, dc across to last dc, 2 dc in last dc turn

Row 3 Repeat Row2

Row 4 ch 3 dc in same St, skip next dc, dc in next St, go back and dc in skipped St (X St made), X St across to last dc, 2 dc in last St turn

Row 5-6 Repeat row 4

Row 7-9 Repeat row 2

Row 10-12 Repeat row 4

Row 13-15 Repeat row 2

Row 16-18 Repeat row 4
Continue in pattern of 3 rows repeat row 2 and then 3 rows repeat row 4 to desired size. At the end of the last row turn ch 1 SC in ea St across. When you get to other end ch 75, for tie SC in 2nd ch from hook and ea of the ch sets when you get back to body either fasten off and attach to other side and repeat tie for this side or sl St across to other side and then repeat tie. Fasten off weave in end

This is what it looked like finished. I write patterns after I finish so if there is a mistake I am sorry. If you use this pattern please give me credit and please don't post to other sites without my permission.


Thursday, July 24, 2014

TBT Bookmark Free Crochet Pattern

This week I decided for TBT I would repost a pattern of mine for a bookmark. This same pattern could be made with worsted weight yarn to make a scarf or afghan. It is easy and would make a great gift at Christmas for the book lover on your list. Make this and insert in a book you give them. Next TBT I will show you two more bookmark patterns. This is my original pattern so please do not repost with out my permission or try to pass off as your own.


Crocheted Friendship Circle Bookmark Pattern


This is the first of the Bookmark patterns I have made to give to followers on my blog mysteryreadingnook.blogspot.com I will be posting another one next week. This is a great small gift for friends, book clubs, and to give with books you give as gifts. Hope you like it and let me know if there are any mistakes in my pattern.


  Crocheted Friendship Circle Bookmark Pattern

Materials

D hook
Size 10 crochet thread I used multicolor

Directions

First motif

Rnd 1 Ch 4 sl st to first ch to form circle ch 1 10 sc in ring join with sl st to beg sc (10 sc)
Rnd 2 ch 3 (1st dc) dc in same st. 2 dc in ea sc around join with sl in top of beg ch 3 (20 dc)
Rnd 3 ch1 sc in same st, ch 3 *sk.next dc sc in next dc, ch 3 sk nxt dc repeat from * around sl st to beg sc (10 sc, 10 ch 3 spaces)
Rnd 4 sl st to first ch 3 spaces, ch 3(first dc) 5 more dc in sp, * 6 dc in next ch 3 space repeat from * to end sl in top first ch 3
Rnd 5 ch 1 sc in same st ch 5 sk next 5 dc sc in next dc ( this is first dc of next group of 6 dc) * ch 5 sk next 5 dc sc in next dc repeat from * around end with sl st in first sc fasten off

2nd motif

Repeat like first motif to last round
Last round ch 1 sc in same st, *ch 5 going through ch 5 sp on 1st motif then sk next 5 dc on 2nd motif and sc in next dc (1st dc of next 6dc) on 2nd motif *repeat one more time from*-* finish last round like last round of 1 st motif

3 motif repeat same as 2nd motif attaching to 2nd motif like 2nd motif was attached to 1 st motif
Follow Deb Forbes's board My patterns on Pinterest.

Tuesday, July 15, 2014

Book review of Crocheting is Fun and Easy by Natalie Johnson


The year is half over and everywhere there are advertisements for Christmas in July. I am already thinking about things to make for Christmas this year, but just have to get started on them. Guess if I don't want to be like every other year and waiting to the last minute I better start putting ideas on the hook and get started now. I have some ideas for things to make other than crocheted items and I hope to share them with you as I go along. I am also starting a baby afghan because I am going to be a Nana again in Feb. Now is a good time to start the blanket and then make clothing items when we know what they are having.

I love that my Grandmother taught me to crochet and that both my Grandmothers were crocheters. I taught my daughter but she doesn't crochet and I taught my granddaughter also and she crochets some.

I have found a book to share with them that is the basics of crochet and teaches different stitches too. It gives so much information from the history of crochet to how to do the different stitches and how to read a pattern. Crocheting is Fun and Easy Grab Your Hook and Join the Fun by Natalie Johnson

I enjoyed reading about the history of crochet in this book since I love history this really appealed to me. It shows many different stitches from basic stitches to more advanced like the basket weave stitch and has easy to follow directions. If I had any thing I didn't like it is that they didn't give more patterns to try the stitches you are learning and the book could use more pictures to help with the explanations. Really all in all this is a good book to help new crocheters and a good reference on the basics for all crocheters.

This is an ebook I got from Amazon and I think it is worth getting if you are new to crochet. Be a good gift to give to someone you are trying to teach crochet to and going through with them.

Next time I hope to have started on Christmas projects and have more of an idea of what it going on the hook this year. Till then

BE CREATIVE AND GET CRAFTING!

Thursday, June 19, 2014

TBT Gluten and Corn free Spicey Hamburger Rice Dish


FRIDAY, JUNE 12, 2009

Gluten and Corn free Spicey Hamburger Rice Dish

We are always looking for ways to change up what we eat because I have to not eat any gluten or corn. My husband came up with this recipe and we really like it. It can be used by itself or with a salad or as a filling for stuffed green bell peppers.
Ingredients are:
1 1/2 lbs ground beef
1 jar Jumping Jacks Mild Salsa ( you can use any salsa of your choice this one is gluten and corn free and is made by my brother)
10 oz of long grain white rice ( we used Rice Expressions organic white rice that is microwaveable)
Shredded cheddar cheese to your liking

Cooking:
Brown the ground beef in a skillet and drain. Cook the rice as it says to. Now to ground beef add the rice and jar of salsa and cook till salsa is warm and ingredients are mixed well. Add the shredded cheese to taste stirring until melted. Serve up and add more shredded cheese to top. Makes a large serving for two if you are hungry. It is a great way to change things up. Hope you like it.

Thursday, June 5, 2014

TBT Simple Blue Scarf Crochet Pattern

Scarfs are one of my favorite things to make and for TBT I have re- posted one of my favorite patterns


Friday, November 30, 2012

Simple Blue Scarf

My Granddaughter turned 18 this month and so I decided to crochet her a scarf. She loves the scarfs I make her from the fun fur to the warm ones and all in between. This one is for warmth with hopefully enough fashion to be worn with anything.


This is a simple pattern but looks elegant.
 
Materials
Caron's Simply Soft yarn in your choice of color ( I used ocean though here it looks really blue)
size J hook
 
Instructions
 
Row 1 ch 250
Row 2 hdc in 2nd ch from hook and ea ch across
Row 3- 4 ch 2 turn, hdc in first hdc and ea hdc across
Row 5 ch 2 turn, hdc in first hdc, ch 1, sk next hdc, hdc in next hdc, *ch 1 sk next hdc, hdc in next hdc repeat in pattern from * to end
Row 6 ch 2 turn, hdc in ea hdc and ch 1 space across
Row 7 ch 2 turn hdc in ea hdc across
Row 8-9 repeat row 7
Repeat rows 5-9 two times more then fasten off and weave in ends.
I made this scarf long so that she can wear it in many different ways.
This would also be easy to make into a cowl by sewing the ends together when finished.
It was simple, easy and fast and I plan on making more for presents. This would also be an easy pattern to make several for gifts to shelters.
I wrote these instructions down after I made this so I am hoping the instructions are accurate.
This is my own pattern and feel free to use but please give me credit
Thanks and happy crocheting
 

Thursday, May 29, 2014

TBT Old Family Recipe Egg Noodle Recipe


My Grandma Snodgrass's Egg Noodle Recipe


This recipe was one handed down from my Grandma's mother to my Grandma to my Mom to me to my Kids to my Grandkids. We had these noodles every Thanksgiving and Christmas. It was always so much fun to go over and help Grandma and Mom make the noodles. I have a lot of great memories of being together, getting flour all over all the while laughing while  mixing, rolling and cutting up the noodles. When Grandma got where she couldn't do it anymore she sat there and supervised the rest of us doing them. This was a family tradition and one I was glad to pass on to my kids and grandkids. No as everyone has grown up and it's harder to get together before Thanksgiving to make these they buy store bought noodles but they are not the same and we don't have the memories we did back when we got together to make them for the holidays. I would never trade the time we spent together making egg noodles. This recipe is in my Mom's hand writing because Grandma didn't write down a recipe. As we did it you just knew if you had enough water and flour and it just became something you did from habit. Mom wrote it down so that it could be passed on to others in the family and I am using it today as my throwback Thursday post.

Always cherish the family traditions and make sure to share the times, stories and make new memories as the next generations come along.

This is Grandma Mattie Snodgrass in the Kitchen.

Wednesday, May 28, 2014

Tardis, Lego, Pokemon Crocheted Baskets for Easter

I know I am a little late sharing the Easter Baskets I crocheted for my Grandkids but things have been busy and I am behind. I decided this year to make a basket of something they all liked. For my smallest grandson 2 yrs old I made a Lego basket because he loves legos. He calls them crackers for some reason but he loves to play and build with them and he loves the lego cartoons and the movie. He will watch Lego Batman and Lego Star Wars over and over and over again. So what better basket than a lego basket.

Of course he, now that the goodies are gone he likes to wear the basket on his head as a hat. My little lego man.
For my 19 year old granddaughter is was easy to know what to make her because her and I have a love of all things Dr Who. So for her I decided to make her a crocheted Tardis Bag for her basket. I figured she could use it after all the goodies were gone as a bag.


Last for my 20 year old grandson I made a Pokemon ball basket. Even at this age he and his friends still like Pokemon so what better thing to make than a Pokemon ball. 


I just made these up as I went and now I am trying to write down the patterns. When will I learn to write them down as I go? Probably never. I hope to have the patterns later but no promises. I may have to make these again just to get the patterns down. Of course I am sure that I will find someone who would be happy to have them if I do.

These were a hit with the Grandkids as you can see in these pictures.


Thursday, May 22, 2014

TBT Crocheted Baby Afghan Pattern

THURSDAY, APRIL 29, 2010


Crocheted Baby hugs and kisses afghan


Baby hugs and kisses afghan

Materials

Rainbow Sensations yarn 2 lg skeins
J hook

Ch 120
Row 1 dc in 4th Ch from hook and ea across. At end of row ch3 turn.
Row2-6 dc in ea dc across Ch 3 turn
Row7-12 ch3 is first dc* sk next dc dc in next dc dc in skipped dc x stitch made * rep from * to last stitch dc in last stitch ch3 turn
Row 13-18 rep row 2
Row 19-24 rep row 7
Continue in thus pattern to desired size finishing with rep of row 2 fasten off

Border
Rnd 1 Join yellow with a sl st in corner st ch1 sc in same st. Evenly scaround putting 3 sc in ea corner to first st put 2 more sc in same st as joining of yarn at beg join to first sc at beg
Rnd 2 ch4(1st dc ch1) dc in same st( v st made) sk next sc v st in nextsc content around putting v st ch1 v st in ea corner. Join to ch3 of beg Ch 4
Rnd 3 sl st to space between first 2 v sts ch4(1st dc ch1) dc in samesp. V st in space between 2 v sts around with v st Ch 1 v st in ch1 spbetween the 2 corner v sts. Join with sl st in 3rd Ch of beg Ch 4 fasten off and weave in.

Wednesday, April 9, 2014

Easter Baskets a Work In Progress

Easter is coming fast and I have started working on Easter Baskets for each of my grandkids. I am crocheting a lego block one for my 2 year old grandson, I Pokemon ball for my 20 yr old grandson and a Tradis for my 19 yr old granddaughter.  I hope they turn out okay but it is a work in progress with a lot of ripping and starting again for me. When I get them done I will show pictures here and hopefully will be able to write the patterns down but since I am doing these as I go I am not sure on the patterns. We will see later how it goes.


I am also working on a picture book for my little grandson that will have pictures of family and things he is familiar with that correspond to the alphabet. He loves doing his ABC's and I thought he would like a book like that. When I get it done I will show it here on the blog but for now I thought I would share the idea with you.


For now keep being crafty

Thursday, April 3, 2014

TBT Gluten Free Beef Teriyaki and Rice

Friday, March 1, 2013

Gluten Free Beef Teriyaki and Rice

 
 Last night was one of those nights where I had to go to the freezer and pantry and use what I had there because I needed a fast easy and delicious dinner. I had frozen  vegetables, rice and ground beef, so I made Gluten Free Beef Teriyaki and rice. It was wonderful and the husband loved it which is a big plus to any recipe. Truth be told I spent most of the day finishing a baby afghan and wrist warmers so I had completely forgotten about dinner so had to have a fast solution. If you ever find yourself needing something good and quick give it a try.

Ingredients:
1 lb lean ground beef
1 pkg frozen Vegetable Medley ( mine had the mix of broccoli, red peppers, and green beans)
1 cup cooked rice
1 13.5 oz bottle of Island Organic Teriyaki from Organiville Foods. They have two different gluten free teriyaki sauces and either one would be great for this dish. http://organicvillefoods.com/category/products/teriyaki-sauces/

Directions:
Brown  ground beef in large skillet and drain. While browning the ground beef cook your cup of rice. I cooked mine in a rice cooker which made it really easy. Also cook the frozen vegetables while browning the meat. Add the frozen vegetables, rice and bottle of teriyaki to skillet, mix well lower heat and let simmer for 10 minutes or till all is heated through and the flavors have mix in well.
Serve with more rice or with a salad and you have a great meal.

Now that you have a fast dinner to fix you can do like I did and crochet away. The pattern for both the wristers and baby afghan will be posted later.

Thursday, March 27, 2014

TBT Chocolate Chip Coconut Macaroons Recipe

I have been craving these but since I am watching what I eat I haven't made any. Here is my recipe that I posted so you can make them maybe and enjoy them.


Wednesday, September 12, 2012

Chocolate Chip Coconut Macaroons

I was looking for a new cookie to try that was easy and quick to make but delicious. I love coconut and chocolate so decided to combine the two into an easy cookie. I had made these simple coconut macaroons without the chocolate chips and decided they would work well with chocolate included. These are a big hit with my family and so easy. Give them a try and remember they would be a great and easy cookie to take to Holiday parties that are coming up.

                                    Chocolate Chip Coconut Macaroon

Ingredients:

1 (14 oz.) pkg sweetened flaked coconut                        2 tsp vanilla extract
1 (14 oz.) can eagle brand sweetened                              1 1/2 cups chocolate chips (or as many as you
    condensed milk                                                             like without over powering the coconut)

Directions:

1. Preheat oven to 350 degrees. Line baking sheet with parchment paper.
2. In a bowl, combine milk and vanilla. Mix well. Add coconut and chocolate chips. Mix well making sure coconut and chips are well coated and mixed together. Drop by teaspoon onto parchment lined baking sheet and with back of spoon slightly press down to flatten some. Bake 8-10 minute or until lightly browned. Remove from baking sheets and place on parchment covered cooling racks.
Depending on how big you make these you can get about 30 cookies. Let cool and then put in container. These will be chewy and sticky but oh so good.

I hope you will give these a try. Easy and delicious.

Thursday, March 20, 2014

Throwback Thursday Lacy Steampunk Wrister Pattern

This is my pattern so if you use it please give me credit. Do not sell or post pattern on another site without my permission.


Wednesday, April 24, 2013

Lace Steampunk Wristers Pattern


Wristers

Materials
Red Heart fashion crochet thread size 3 ( I used black)
F hook

Instructions
With f  hook ch 41
Row 1 sc in 2nd ch from hook and ea ch across ch 1 turn (40 sc)
Row 2 sc in first sc, ch 2 skip 2 sc, sc in next sc,* ch 2 skip 2 sc sc in next sc, repeat from * to end ending with sv in last sc ch 1 turn
Row 3 sc in first sc, *2 sc in ch 2 sp, sc in sc repeat from * across ch 1 turn
Row 4 sc in first sc,* ch 2 skip 2 sc, sc in next sc, repeat from * across
Row 5 repeat row 3
Row 6 rep row 4
Row 7 rep row 3
Row 8 rep row 4
Row 9 rep row 3
Row 10 rep row 4
Row 11 rep row 3
Row 12 rep row 4
Row 13 rep row 3
For border do sc in ea st around and down sides putting 3 sc in ea corner. Sl to beg sc
Sl in first 10 sc sc in next st (ch 3 skip 1 sc sc in next sc) 9X sc in next st leave rest of row unworked
Ch1 turn sc in sc ch 3 sc in next sc across ch 1. Turn
Repeat for 3 more rows
Ch 1 sl to ch 3 loop sc in loop ch 3 sc in next ch 3 loop across to last loop sl to last sc ch 1 turn repeat for 9 rows last row is just one loop sl to sc then ch 12 sl to sc on other side of ch 3 loop. Sc in ea ch of ch 12 sl to beg and finish off

Go to side and attach string on side with slip.st ch 1 sc.in same space 15 sc across side. Ch 1 turn sc in ea sc
Do 2 more rows of sc for total of 4. At end of last row ch 1 turn sl st in first sc ch 5 sk 5 sc sl st in nxt sc ch 5 sk 5 sc sl st in next sc ch 5 sk next 5 sl in last sc finish off (3 ch five loops made)
Repeat on other side
For tie.ch 50 weave tie through ch 5 loops on sides
Sew a metal key to middle of hand back

As always I made these up as I went then wrote the pattern down. I try not to make it too confusing or have mistakes but mistakes are possible.

Enjoy the pattern if you make them let me know and show pictures.


Thursday, March 13, 2014

Throwback Thursday Easter Basket from a Crocheted Doily

Thought I would share this again for Throwback Thursday so that you will have time to get started on them if you want them for Easter. You can crochet your favorite doily or get one of the store bought ones to do this. I prefer to make mine but either way hope this gives you an idea for Easter Baskets this year.


Thursday, February 26, 2009

Crocheted Doily Easter Baskets


Last year for Easter I made my Grandkids, Aunt and Mom and Dad Easter baskets from crocheted doilies. The picture above is of one of them. After Easter you can put other things or silk flowers in them for decoration. It is a simple way to make a basket.

This picture is of another doily basket I made and put flowers in for a table decoration at a retirement party. I had done some in smaller doilies and some in this size. The smaller ones were on the tables that people sat at and this and another one just like it was on the serving tables.

The way to make these is simple. You crochet your favorite doily and then you put it into a plastic bag with fabric stiffener. Make sure you get the whole doily wet with the stiffener then squeeze off the excess. Drape the doily over a bowl or whatever you have that is the shape you want the basket to be in and let dry completely. Remove and add flowers or plastic eggs or whatever you like. That's it simple. I hope you try this and enjoy.

Thursday, February 27, 2014

Throwback Thursday Candy Recipe from past

Friday, February 20, 2009

Chocolate Peanut butter Peanut Clusters

I have to eat things without gluten or corn and was really wanting some chocolate so at Christmas my daughter, granddaughter, grandson and I decided to make some candy that I could eat and everyone liked it too. I will share some more with you later but here is one of the ones we made.

Chocolate Peanut Butter Peanut Clusters
Ingredients
1 12oz pkg gluten and corn free chocolate chips(we used Whole Foods 365 brand)
1 12oz pkg gluten and corn free peanut butter chips
1 jar of roasted peanuts (make sure no cornstarch has been used by looking at the ingredients on the jar.)

In a microwave safe bowl put 2/3 of the pkg of chocolate chips and the whole pkg of peanut butter chips in the bowl. Heat at 30 second intervals till melted. Stirring half way through. Take bowl out and add the rest of the chocolate chips to temper the chocolate stir till the chips are melted. Add the jar of peanuts or as many as you like to taste. Stir till thoroughly mixed then you can either spread the mixture out on wax paper and let it cool or you can use a spoon and put the mixture out by spoonfuls on the wax paper and leave to cool. If you spread the mixture out when it is cool you can break it into pieces. Store in an airtight container and enjoy.

Thursday, February 20, 2014

Throwback Thursday Crocheted Steampunk Wristers

Friday, March 22, 2013

Crocheted Steampunk Wrister

My Grandchildren and their friends have a Steampunk group and so I crocheted the girls a steampunk sort of wrister to go with their outfits. They seemed to like them and wore them all weekend. It was a simple pattern that just went around the wrist and across the top of the hand so that the palm was open. I added keys to the hand and a tie to hold the sides together. I think they turned out pretty good. Here is a couple of pictures. What do you think? Leave me a comment if you would like to buy one.
Tomorrow I will be giving you my latest baby afghan pattern.

Thursday, February 13, 2014

Throwback Thursday Recipe of My Grandmothers


Guess I have been feeling a little nostalgic this week and was looking at some of my Grandmothers old recipes. My Grandmothers were good cooks and we always loved what they had for use to eat. My Grandma Snodgrass lived with us and she taught me how to make fudge, divinity, noodles and so many other things. Grandma Jester could make a hamburger special and so good. I loved her hamburgers, fried chicken and just about anything she cooked but her baking goodies were the best. I loved her Watergate Cake, her Banana Cake and all the breads and cookies she made. I thought today on Throw Back Thursday to share one of Grandma Jesters Recipes with you. Sure does bring back memories.


This Recipe is in Grandma's handwriting which makes it special to me. This Cake was so moist and flavorful and I loved it. When she died she had one in the freezer for a friend who loved this cake. What a treat.
 
This is a picture of my Grandma Gusta F Bilyeu Jester.
Hope you will try Grandma's Recipe. It was fun thinking about her and all her goodies she made us.

Thursday, February 6, 2014

Throwback Thursday Recipe Mom's Eggless Cake

This is one of my all time favorite cakes and one my Mom made for me every year for my birthday. Brings back memories and is a great Throwback Thursday recipe


Monday, April 26, 2010

Mom's eggless cake recipe

 Mom's Eggless Cake Recipe

Ingredients:
1/2 cup shortening
1 3/4 cup sugar
2 cups buttermilk
3 cups flour
2 tsps soda
3-4 tsps cinammon
1 tsp nutmeg
1 tsp vanilla

In mixer mix all the above ingredients together alternating the milk and flour
Pour into a greased and floured 13"x9" cake pan
Bake in a 350 degree oven for 35 min or until done in the middle. Test by inserting knife in middle and if comes out clean done

Icing
Combine 1 cup brown sugar
2 tbls milk
2 tbls coconut (add more to your taste)
Mix and sprinkle on top of cake while cake is still hot
Put under broiler till bubbles

Now I know this recipe is not gluten and corn free but I am going to replace with gluten free all purpose flour and try it. Will post how it comes out then Until then try this recipe because it is a delicious cake.

Friday, January 31, 2014

Be Glad When Over This Cold

 I am so glad that it is the weekend. I have been sick with a cold for two weeks but this week I have really been sick. Sleeping a lot and just feeling bad. Today is somewhat better but so glad it is the weekend and can rest all weekend. I know they say this is a bad year for the flu so glad we got the flu shot. Hope everyone is doing okay and avoiding this flue and cold that is going around.
     I have not been doing any crafts but have worked a couple of rows on a baby afghan. When I feel better I need to get it done and will share photos.
  
  I haven't been feeling like doing anything at all so this is the first day I have felt like posting. Hoping to get back in the swing next week. Until then Stay Warm, drink lots of Orange Juice and stay well.


Saturday, January 18, 2014

This Week in Review and Sloppy Joe Casserole Recipe

     Hope everyone's week was good.  I have finished a couple of books and posted the reviews on my other blogs, started crocheting a baby blanket, started 3 more books, tried some new recipes for dinner and did some genealogy. Good week.

     I made homemade hamburger soup that we all love on Tuesday night and decided to try a recipe from Bisquick for gluten free bread sticks. I wasn't sure if this was going to work but they really turned out good. I got the recipe from http://www.bettycrocker.com/recipes/biscuit-sticks/5d670e15-a7da-4091-b59d-e8d3f1766acb. I just added about 1/4 tsp to the Bisquick whisked them together and then followed the recipe. They turned out really good, sorry I didn't think to take a picture of them. Try these with regular Bisquick or like I did use the gluten free Bisquick.

   Thursday night I wanted to use up the russet potatoes that I was afraid would go bad and the hamburger I had left.  The same old thing of hamburgers and fried potatoes didn't sound good to me, I wanted something different so I decided to make a Sloppy Joe Casserole instead.


Ingredients:

1 lb ground beef I used 85% for less fat
1 can Manwhich ( you can use any sauce you want that you normally use for sloppy joes. I usually make my own but had this can and decided to make it easy on myself)
5 potatoes
shredded cheddar cheese
Ketchup
olive oil

Directions

Pre heat your oven to 400 degrees.
Brown your ground beef. Drain the fat and then add your can of Manwhich or sauce you use. Simmer.
While you are simmering the sloppy joe cut up your potatoes into thin slices. Put olive oil in to your skillet and heat. Put potato slices into oil and cook till tender like you would for fried potatoes.

Take a pan and put the sloppy joe hamburger mix in the bottom. Top with the potatoes. Now cover with aluminum foil and put in oven for 10 minutes covered. Take out and drizzle ketchup over the top of the potatoes and then put the cheddar cheese on top to cover the potatoes. Put back in oven for another 5 minutes or until cheese is melted completely. Serve with a nice salad and the breadsticks from the above recipe and you have a delicious meal.

I would have used hash browns or tator tots instead of the russet potatoes but I needed to use up the potatoes. I think if you used either one of these it would be really good.
It was a hit at our house.

Thursday, January 16, 2014

Throw Back Thursday My Grandma's Hot Pad Pattern

Thought this would be a good pattern to share again on throw back Thursday. I can remember my grandmother making these for everyone and when she taught me to crochet this is one of the patterns she taught me to make. I still make them for family and friends. Hope you will give it a try. If you do leave a comment and a picture of what you make. If you have any questions leave them in the comment section and I will try to answer them. If you like this blog please follow me.


Thursday, June 4, 2009


Crocheted Hot Pad Pattern

This pattern is my own. My grandmother taught me how to do this by using a washcloth and folding it then crocheting around but I changed to make the cloth too because it is a thicker hot pad then. Hope it isn’t confusing they way I explain it.


With 100% cotton and a G hook
Row 1 with cotton and G hook ch 47. hdc in 3rd ch from hook and in each ch across. Turn
Row 2 ch1 hdc in each hdc across turn
Row 3 – 40 repeat row 2 At end of last row fasten off
You may have more or fewer rows depending on how tight you crochet. What you want is a rectangle

Now comes the folding. Take the cloth just made and fold in half. Pin to help hold in place to keep it from slipping when you start to crochet the border.
Starting at the top left corner
attach 100% cotton ch 3 do 2 dc in same space ch 2 skip one space dc in next sp ch 2 skip one space 3dc in next space ch 2 skip a space and in next space dc. Continue around in this pattern.
Go down the left side across the bottom and up the right side


Shown in this picture

Now take and fold to meet the top left corner to the meet with top right corner in the middle pictured below.


Pin to hold and then slip stitch right corner to left.
Now pin the sides and they will be squares on each side like the picture below


This will be square on both sides when you pin them.
Ch 2 and continue pattern where you left off across one side and top opening, down the side and across the bottom up the other side and across the top opening. Now all sides should be worked and you are back to the top. Slip stitch to the stitch on the other side across from last stitch made. Ch 10 sl st to form a ring and this is your hanger.

If you have any questions or would rather buy one from me contact me at lhxpmdj@aol.com